This is a long-overdue blog edition — at least five of my next posts will be "overdue." Why do I say that? Because these are elements of photography I've known and could have shared at any point along my journey. I simply want to start that sharing process, because sharing is kindness, and sharing is caring. This is written in my own language and understanding, for readers who want to learn the photography process and all the elements that make up how and why to take a particular photo.
Composition: how are you framing your shot?
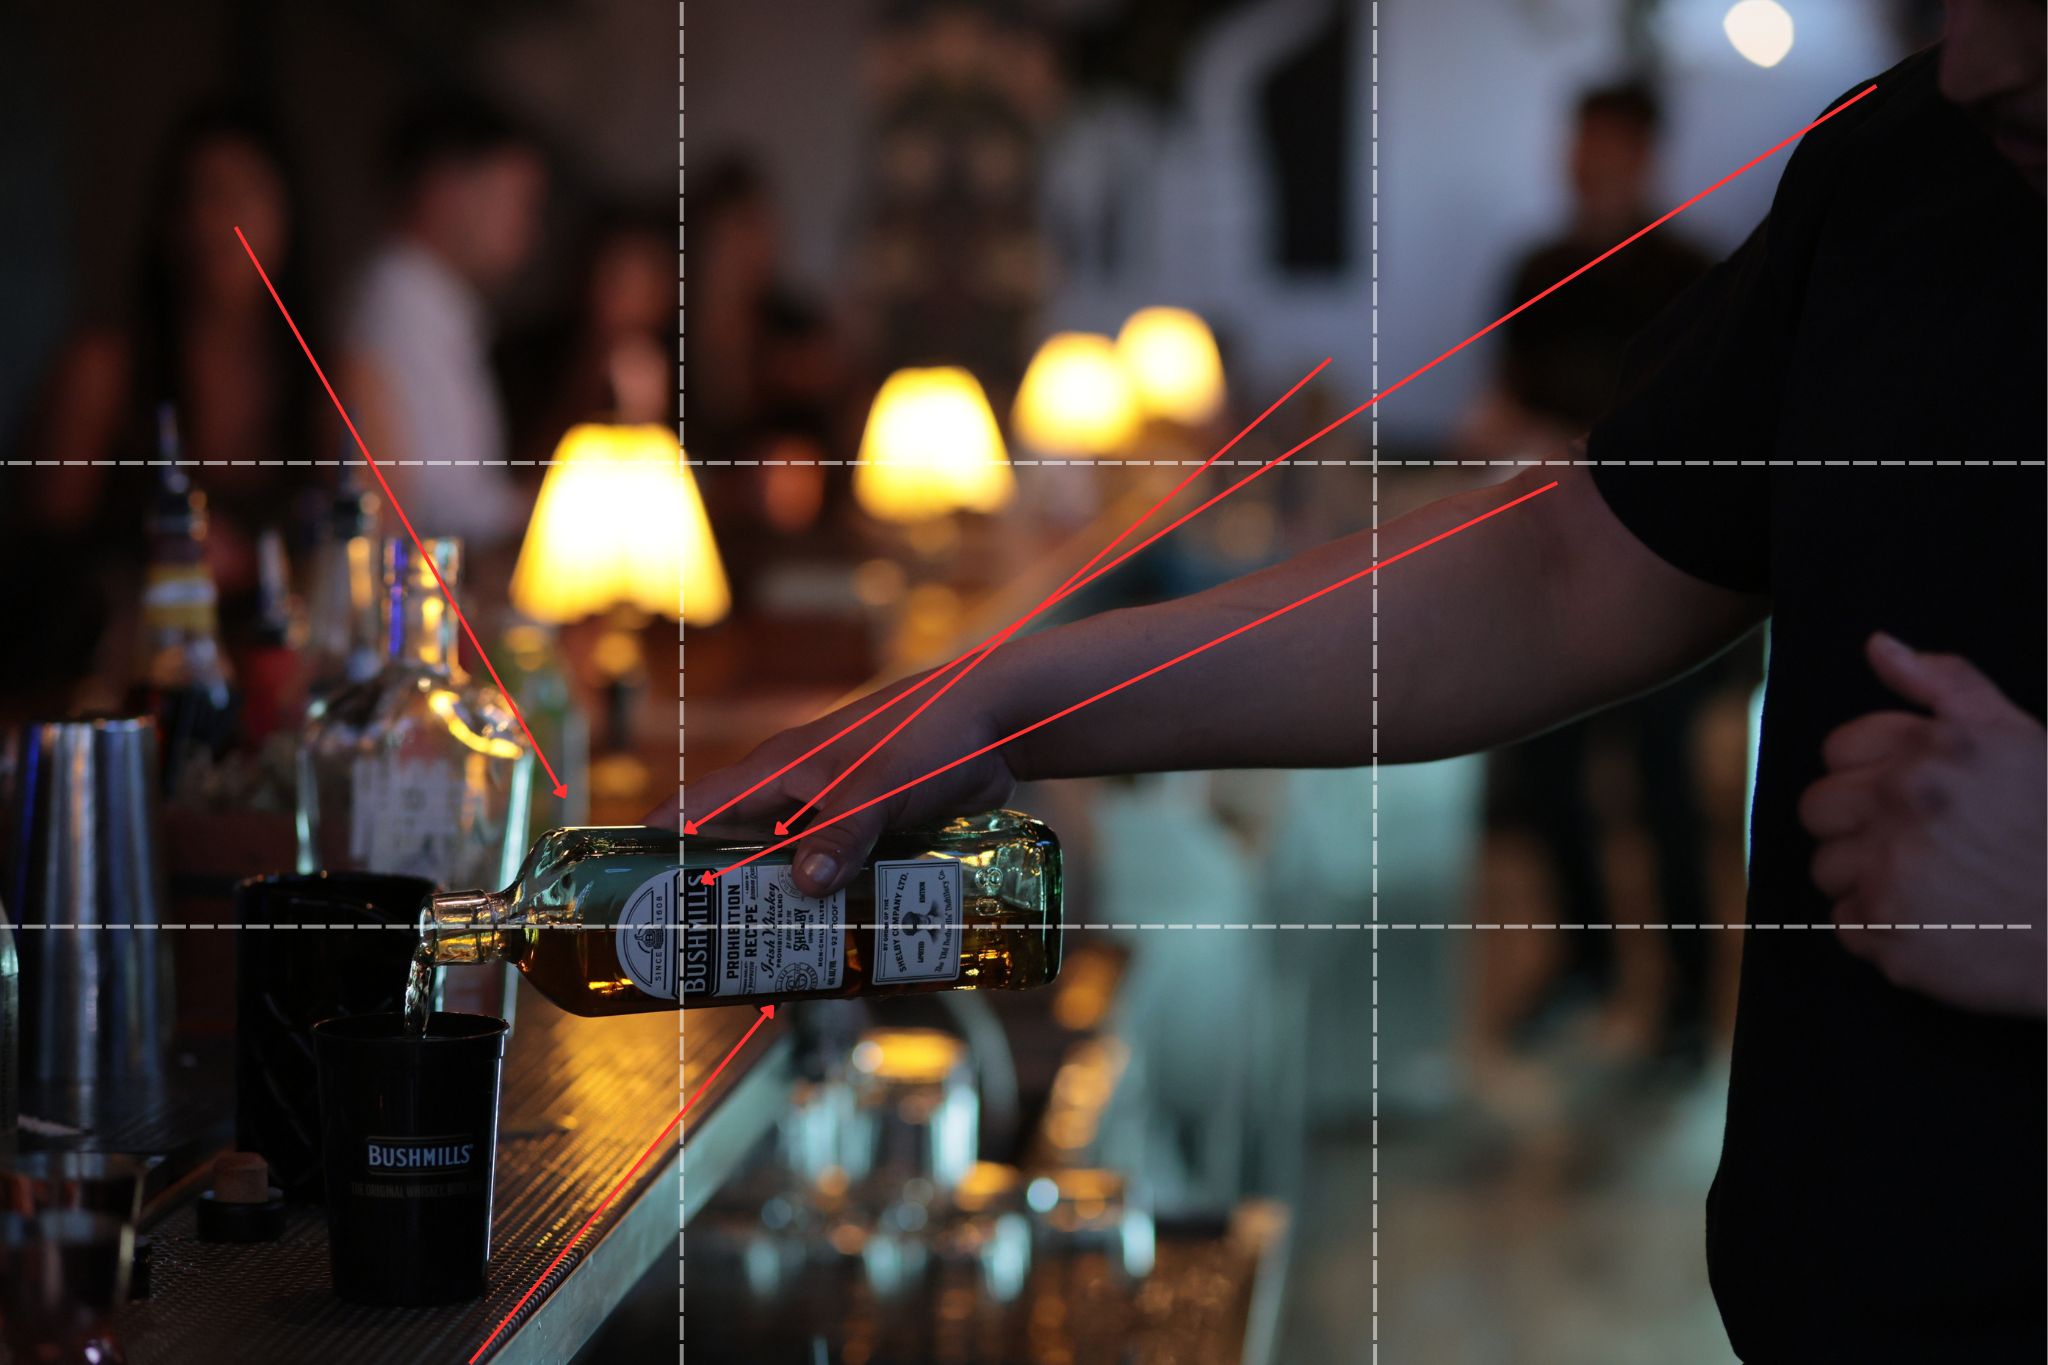
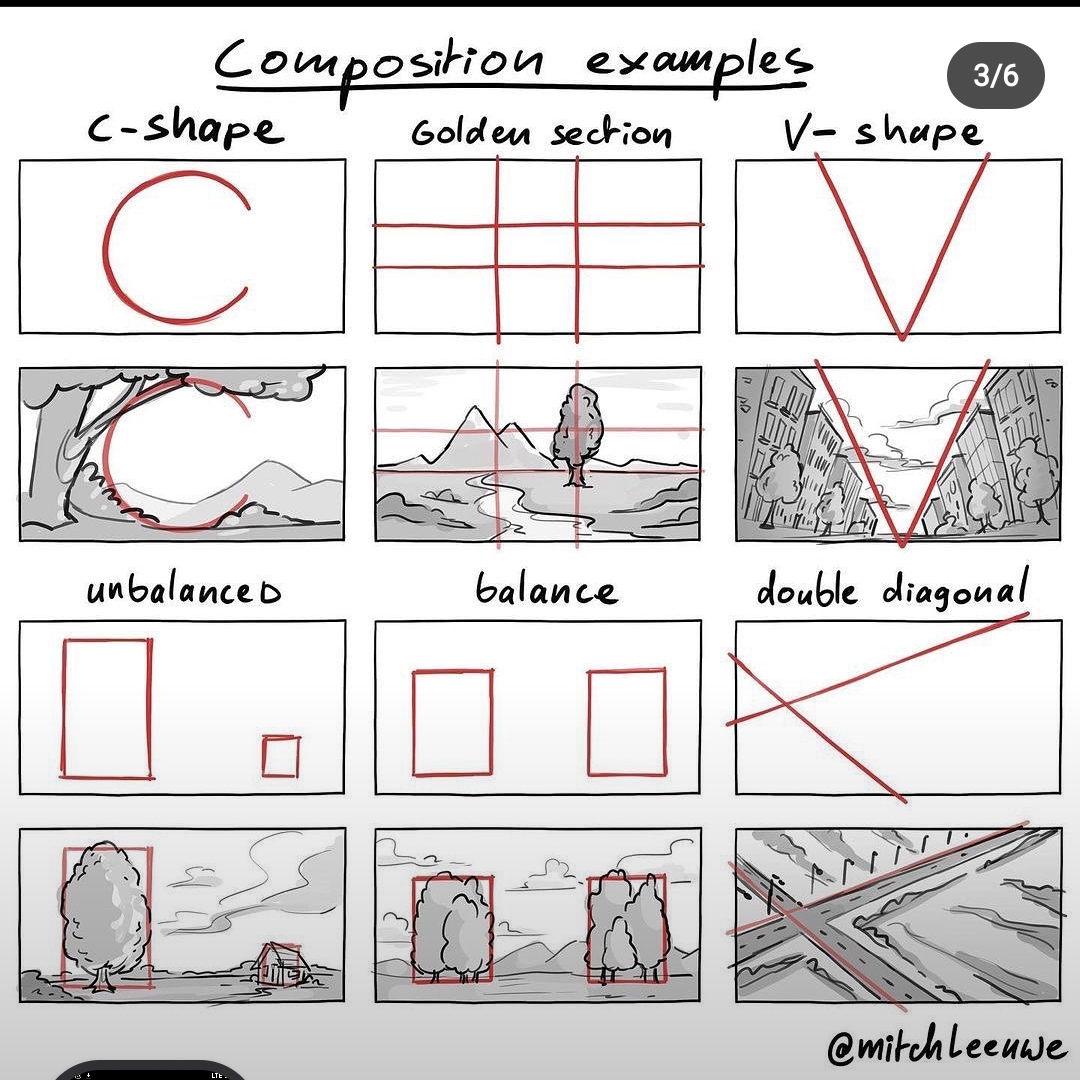
Composition is the rule of why and how you place your subject within the frame of your lens at the moment you take a photo. It's the intentional arrangement of real-life elements — using techniques like the rule of thirds, juxtaposition, and leading lines — to build the photo on purpose rather than by accident.
Here are the core terms, defined:
- Subject
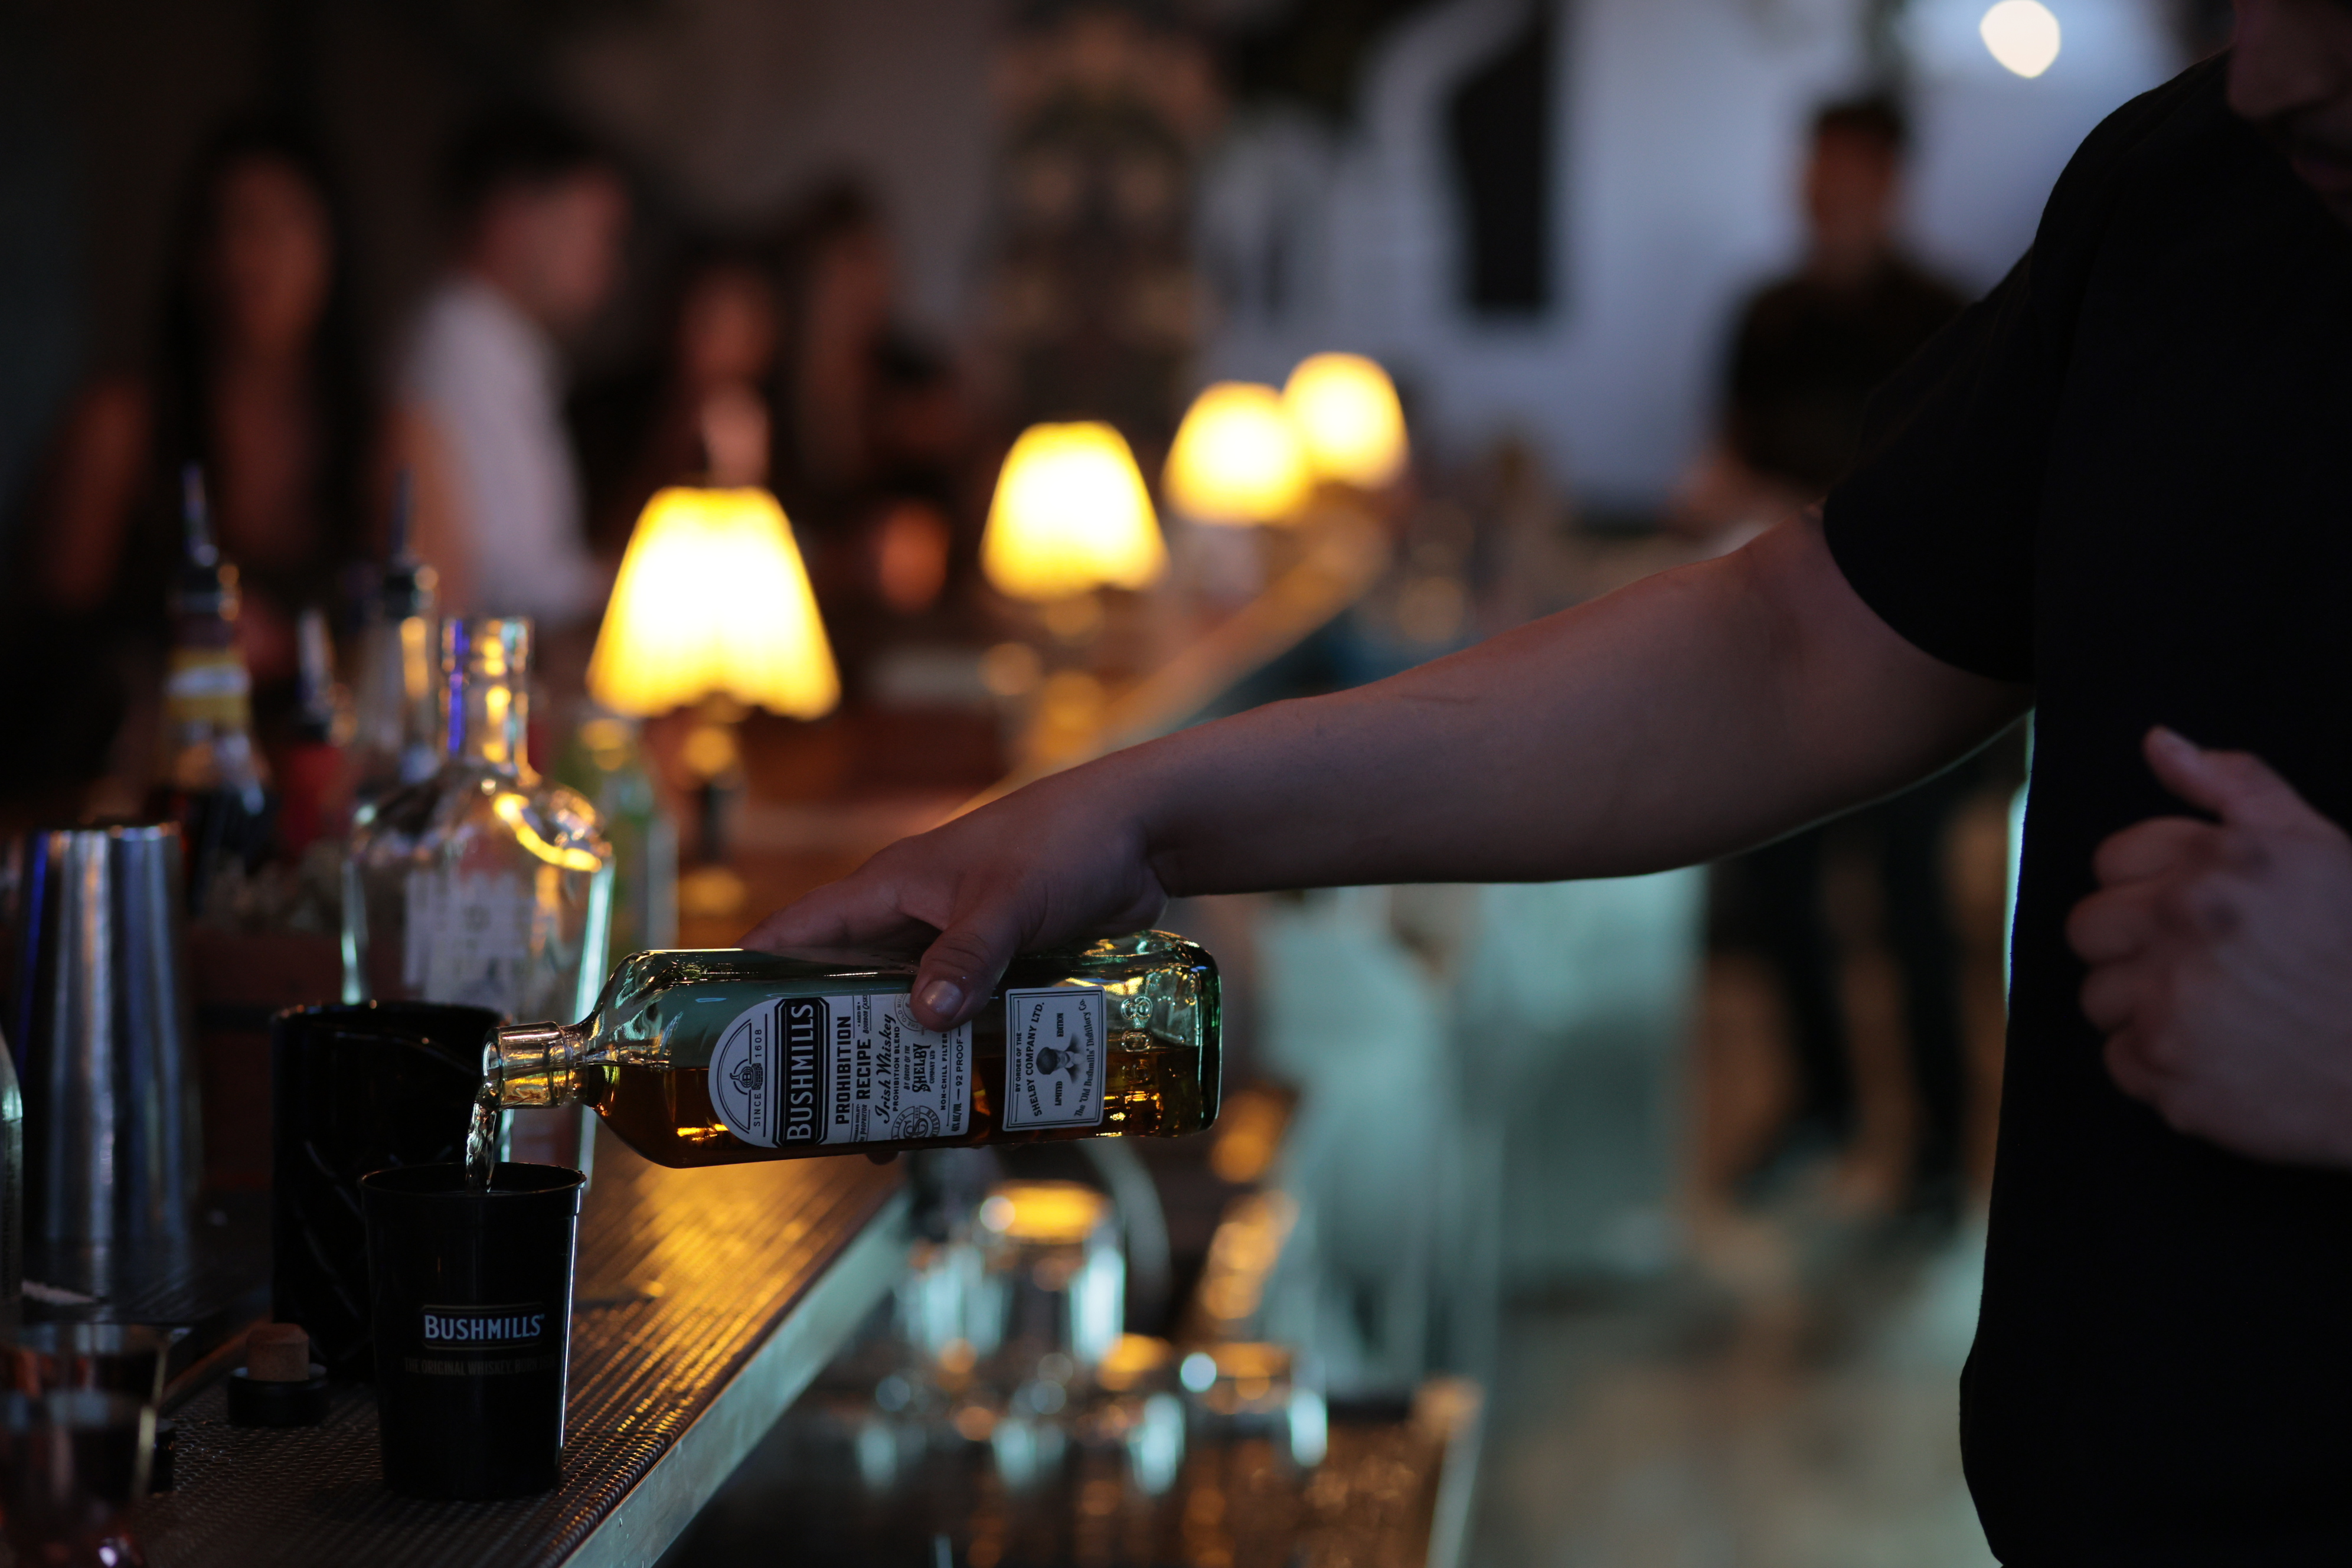
- What or who appears in your photo — the intentional substance of the shot. In the photo above, the subject is the bottle of Bushmills being poured.
- Frame
- The entire rectangle your camera's view screen shows you — the whole photo. The frame above contains the bar, bottles and glasses, a pouring bartender, a second bartender, guests, and lights down the bar.
- Composition
- The intentional arrangement of real-life elements, using techniques like rule of thirds, juxtaposition, and leading lines, to create the photo.
- Focal point
- Our photographs have intent. Where are we trying to draw the viewer's eye? Composition is the tool that creates an intentional focal point — the area of the photo your eye ends on.
- Camera settings
- The options behind the camera screen that let you capture photos with precision. They're the input before the shot that determines how the final photo looks — including what each button on your specific camera does or doesn't do.
- Focus point
- Your camera settings offer options like single point, zone, and others (names vary by brand). A single point is where you — or the camera's auto setting — choose a specific spot in the frame to focus on. For example, an eyeball.
- Focus
- The portion of the photo that appears sharp and detailed. It can be the whole photo or just a part. Focus occurs on a two-dimensional plane at the distance where the focus point is placed. Depth of field describes how much of the area in front of and behind that plane also appears sharp — aperture largely controls the depth, while shutter speed controls whether movement is captured fast enough to stay sharp.
Exposure: how much light the sensor records
Exposure is the amount of light recorded by the camera sensor at the moment the photo is taken. There are good reasons to underexpose or overexpose — it depends on what you're capturing and how you want the photo to look. The details deserve their own writing, but for now: exposure is determined by the relationship between aperture, shutter speed, and ISO.
The exposure triangle: aperture, shutter speed, and ISO
The exposure triangle is the three camera settings that together determine how your photo is exposed: ISO, aperture, and shutter speed. The correct exposure depends on your intention as the photographer, and sometimes on the subject itself. These three matter because they decide how the captured light is recorded in the photo.
- Aperture
- Controls how tightly the blades inside the lens are closed. The more closed (finer) the blades, the more depth of field the photo has. Aperture is measured in f-numbers — for example f/1.4 (wide open) or f/22 (narrow). Watch the wording: f/1.4 is a large aperture (a big opening), even though 1.4 is a small number. So if someone asks for a "large aperture," they mean a small f-number. The lowest f-number on your camera means the blades are as open as they get — more light reaches the sensor, and you typically get a shallow depth of field with a blurred background. A high f-number like f/22 means the blades are closed down finely, putting most or all of the image in focus depending on your focal point.
- Shutter speed
- The shutter is what closes and captures the photo — the "click" you hear when you press the shutter button. Settings run from fast to slow: 1/8000 is fast, 30" is slow. 1/8000 is that fraction of a second that clicks and captures the shot. The faster the shutter speed, the faster the action you can freeze — to capture birds in flight with every detail of their wings, you'd use at least 1/1000, probably more. Slower speeds like 0.3", 1", or 30" are measured in seconds (1" = one second, 30" = thirty seconds). You use these for subjects that aren't moving, with the camera firmly mounted on a heavy tripod. Even the shutter mechanism's own vibration matters — the more solidly the camera is placed, the less likely you'll see blur.
- ISO
- The third corner of the triangle. It controls the sensor's sensitivity — the higher the setting, the more amplified. Aperture and shutter speed set the actual amount of light entering the camera; ISO increases it artificially through the camera's computer. The higher the value, the more grain or "noise" is introduced. On Canon cameras the native value generally starts at 100 and can climb as high as 512,000. Some cameras tolerate high ISO well and stay clean; others don't. I shoot on a Canon R6 Mark II, and its low-light capacity (with high ISO) is excellent. Sony also has a strong reputation — possibly the best, in its top models — for low-light photos.
- Noise
- The graininess introduced into a photo. It shows up for several reasons — two common ones are underexposing a photo that has dark, shadowy areas, and using high ISO settings.
- Exposure Value (EV)
- A numerical readout the camera shows in real time as it adjusts up or down — often labeled EV +1/+2/+3 or EV -1/-2/-3.
Basics out of the way — now what?
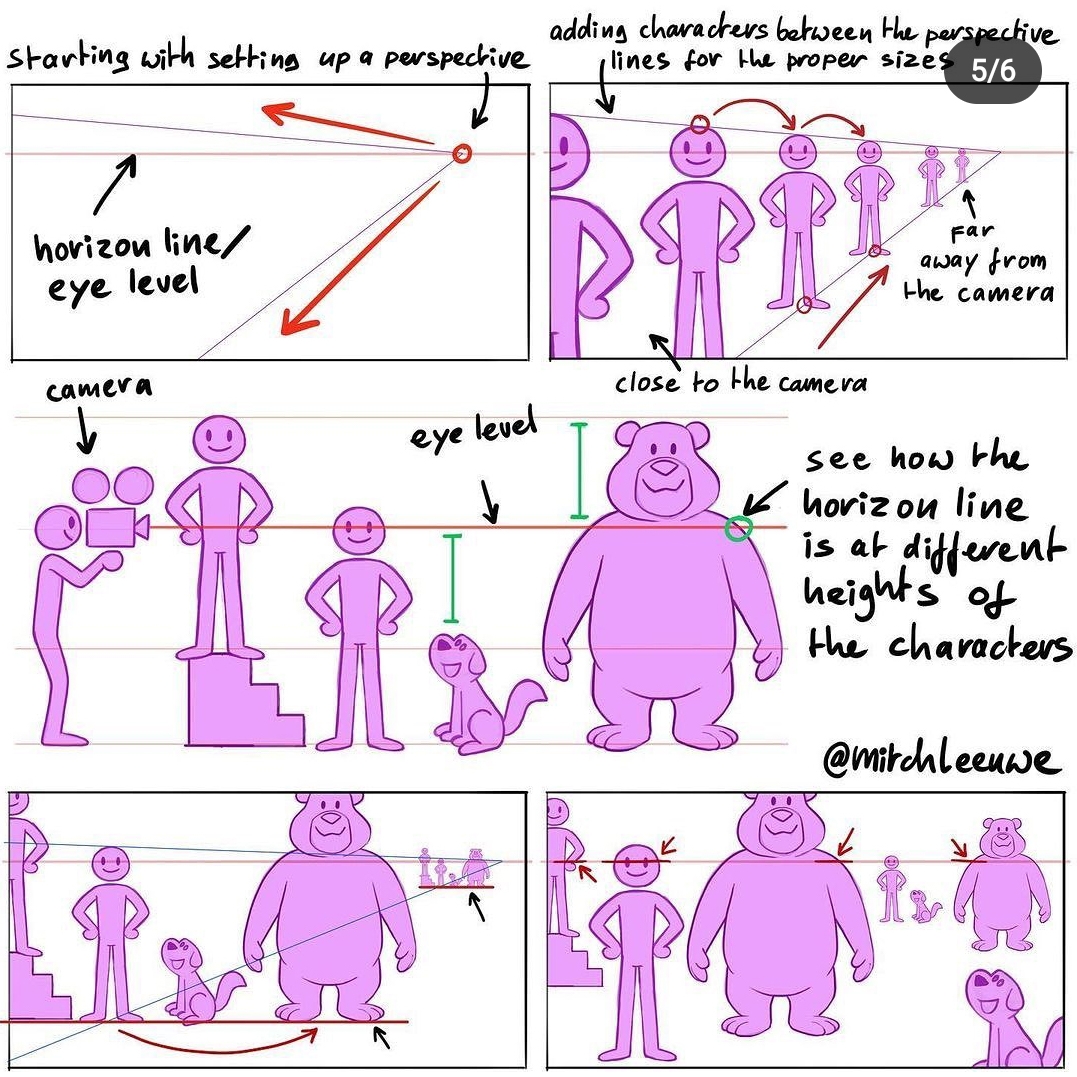
Get to practicing, of course. Bring your camera with you everywhere — you never know when or where you'll find an amazing opportunity. But first, a gift: an event photographer and YouTuber I look up to as a dedicated professional gave me this composition file, and it was a big help when I was starting out.
Where to practice in San Diego
If you're learning, here are some local spots and beginner-friendly styles to practice:
- Imperial Beach — the land there is expansive and offers excellent views for landscape photography and for practicing composition with leading lines and the rule of thirds.
More to come…
Want professional photo and video for your business instead of shooting it yourself? See the Asset Bank or view pricing.